![]()
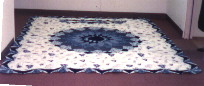
Pattern-Blue Dahlia
![]()
This pattern is an old favorite that's been around for many years. It can look striking and bold or soft and flowing depending on the colors you pick. Pick any colors you want... Let your imagination be your guide.
| * 1/4 yard rose solid for A |
| * 2 1/2 yards light rose print for # 1 (for B and M) |
| * 2 1/2 yards dark rose print for # 1(for C, E, and L) |
| * 5/8 yard medium rose print for # 1 (for D and M) |
| * 1 yard light rose print for # 2 (for G ) |
| * 1 yard medium rose print for # 2 (for F) |
| * 1/2 yard dark rose print for # 2 (for H) |
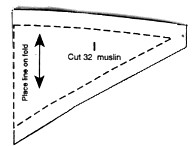
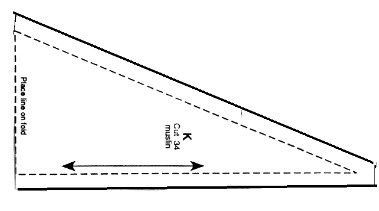
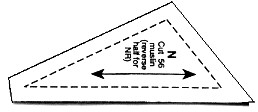
| * 7 yards muslin (for I, J, K, N and panel) |
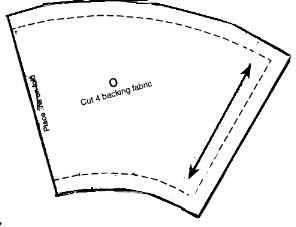
| * 7 1/2 yards backing and facing fabric |
| * Batting - 80" x 102" |
![]()
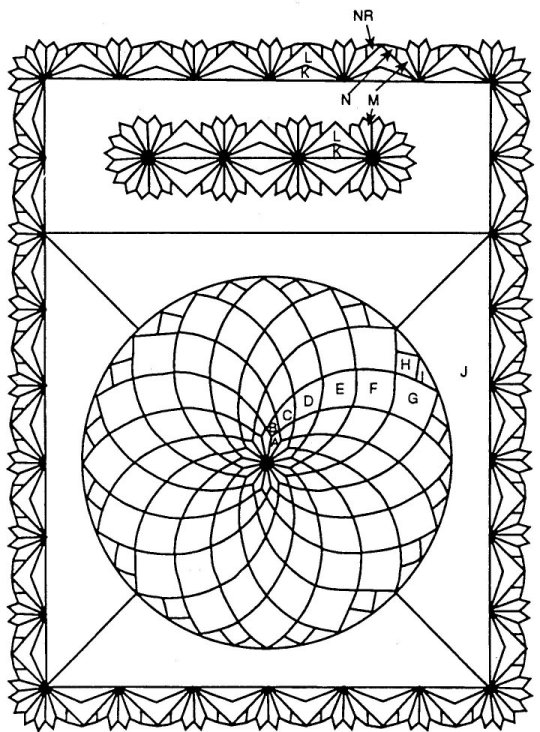
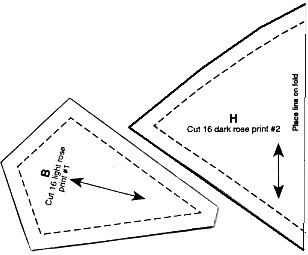
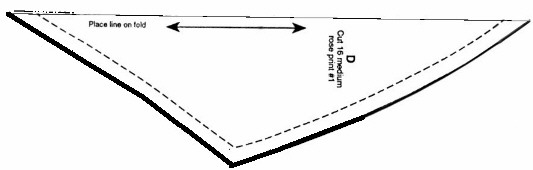
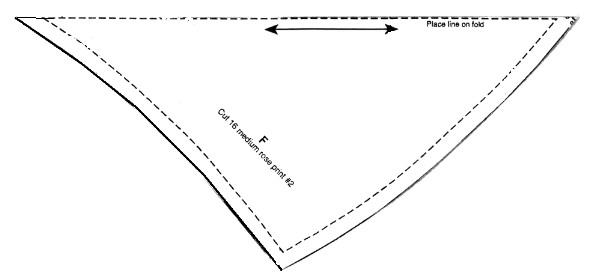
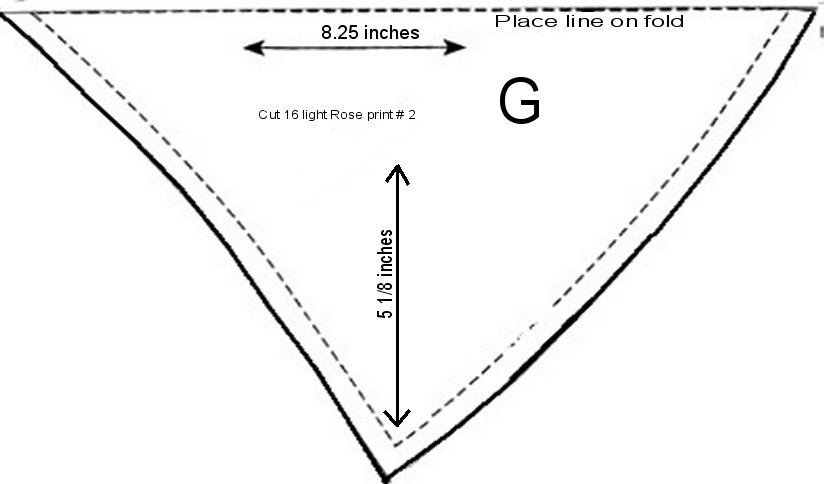
Prepare templates using pattern pieces given. Notice that many of the pieces are to be CUT ON THE FOLD. If it would be easier for you to cut in layers then use the half pattern given to make a template for the whole piece. Cut as directed on each piece.
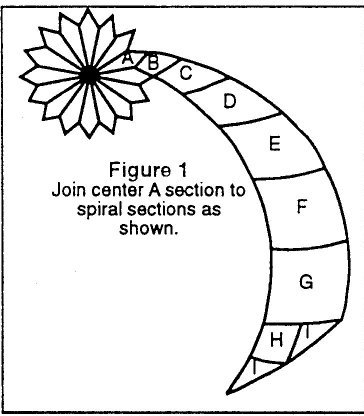
Begin by piecing the center A section, being careful in the center where all the points meet. Always press with all seams going the same direction.
Referring to the next picture, (figure 2), make a J pattern from a large piece of paper.
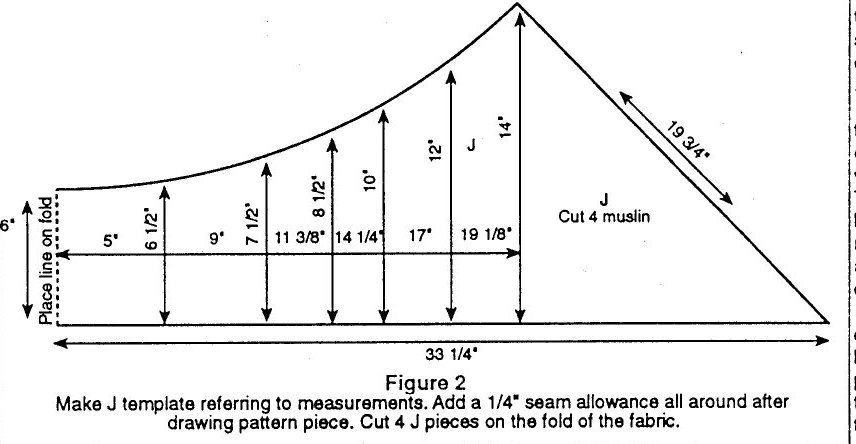
Sew the J pieces to the center pieced unit and join J to J at the corners.
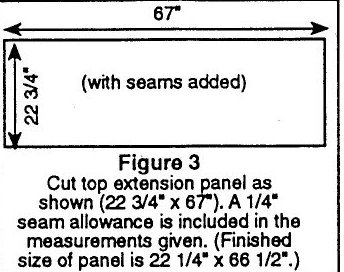
Cut the top panel piece for the pillow tuck from the muslim using figure 3 as the pattern. Cut 22 3/4" x 67" (seam allowance is included in this measurement).
Fold the panel piece to find the center and crease. Piece the center applique' section as follows: Sew L to K. Repeat and join on K side. Sew M to each L side., repeat twice and join the 3 units at M ends. Sew 8 M units together to make end flowers and sew one unit to each end of the pieced unit. Turn under edges 1/4" all around and center on panel using fold lines as a guide for placement. Applique' in place with a slipstitch or blind applique' stitch.

Sew panel to previously completed larger flower panel to complete inner portion of quilt.
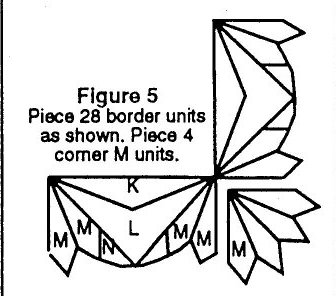
To make borders, piece 28 K-L-M-N units together using Figure 5 as a guide.
![]()
These are the actual pattern pieces. They
should be the correct size. They will be easier to use if you
paste them to stiff cardboard to use as a cutting template after
you print them out. 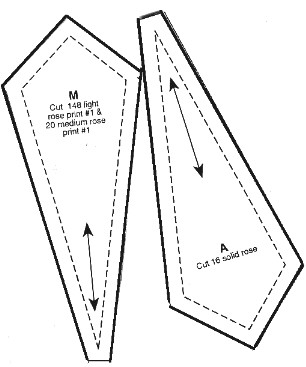

.
.

.
.
.
.
.
.
.
.
.
.
.
.
.

.
.
.
![]()